Partner with Reveation Labs today and let’s turn your business goals into tangible success. Get in touch with us to discover how we can help you.

Gunjan Deore
04 Mar 2022
Introduction
Netlify CMS is an open-source content management system for your Git workflow that enables you to provide editors with a friendly UI and intuitive workflows. Add Netlify CMS to your site by creating and configuring files, then connecting the CMS to your site through user authentication. And finally, you'll learn how to access the CMS admin so that you can write your blog post.
Basic Introduction of Netlify CMS & GraphQL
What is Netlify CMS?
Netlify CMS is an open-source content management system for enabling your Git workflow. It provides user-friendly UI and intuitive workflows. Using this netlify cms concept create faster, more flexible web projects with any static site generator. Content is stored in your Git repository alongside your code for easier versioning, multi-channel publishing, and the option to handle content updates directly in Git.
What is GraphQL?
GraphQL is a query language for your API, and a server-side runtime for executing queries by using a type system you define for your data. GraphQL isn't tied to any specific database or storage engine and is instead backed by your existing code and data.
What is Markdown File?
An MD file is a text file created using one of several possible dialects of the Markdown language. It is saved in plain text format but includes inline symbols that define how to format the text (e.g. bold, indentations, headers, table formatting). MD files are designed for authoring plain text documents that can be easily converted to HTML.
Prerequisites
- Basic knowledge about the Vue JS and GraphQL APIs
- Must have a Netlify account and should be familiar with Netlify Portal
Let's start !!!
Step 1: Create a netlify account
Select your preferred authentication signup method or use your email.
Step 2: Create the site from git
After successfully creating the account, you'll be able to access the Netlify dashboard. To Create a New Netlify Hosted site from your Github repository Follow the below-mentioned steps.
- Click on "New site from Git" - Select GitHub as your provider - Choose the Repo that you would like to Host.
Step 3: Configure your settings
Here you can configure your options. Make sure your site build command is "npm run build" and the public directory will be "dist".Then click on "Deploy site"
Step 4: Build & deploy your site
Now your site is ready to build and host with the free hosting
Step 5: Adding netlify CMS to an existing site
Netlify CMS itself consists of a Single Page Application built with React that lives in an admin folder on your site. admin ├ index.html └ config.yml
admin/index.html
1<!doctype html> 2<html> 3 <head> 4 <meta charset="utf-8" /> 5 <meta name="viewport" content="width=device-width, initial-scale=1.0" /> 6 <title>Content Manager</title> 7 8 <script src="https://identity.netlify.com/v1/netlify-identity-widget.js"></script> 9 </head> 10 <body> 11 <!-- Include the script that builds the page and powers Netlify CMS --> 12 <script src="https://unpkg.com/netlify-cms@^2.0.0/dist/netlify-cms.js"></script> 13 </body> 14</html>
If the location of the file is admin/index.html, then the entry point for the Netlify CMS admin interface will be accessible by navigating to "yoursite.com/admin/.
admin/config.yml
1backend: 2name: git-gateway 3branch: master # Branch to update (optional; defaults to master) 4 5media_folder: "static/uploads" 6public_folder: "/uploads" 7 8collections: 9 10- name: "blog" # Used in routes, e.g., /admin/collections/blog 11 label: "Blog" # Used in the UI 12 folder: "blog" # The path to the folder where the documents are stored 13 create: true # Allow users to create new documents in this collection 14 slug: "{{day}}-{{month}}-{{year}}" # Filename template, e.g., YYYY-MM-DD-title.md 15 fields: # The fields for each document, usually in front matter 16 - {label: "Title", name: "title", widget: "string", required: true} 17 - {label: "Blog Creater Name", name: "blogerName", widget: "string", required: true}
The backend section covers the basics like which branch to update and sets up the Git Gateway connection that we talked about earlier. The publish_mode property sets up our workflow to use the editorial mode. In short, this means that we have the ability to save page drafts as pull requests in Git before we decide to publish them.
Step 6: Upload folder
Create an "upload" folder at the "static/uploads" location in your base directory to store media files. After creating the folder set the folder path in config.yml for "media_folder" and "public_folder" entries.

Step 7: Enable identity
After configuring the project, visit the Netlify console to enable the Identity. Go to the Identity tab and click on "Enable Identity" which will successfully enable your identity for Authentication purposes.

Step 8: Enable git gateway
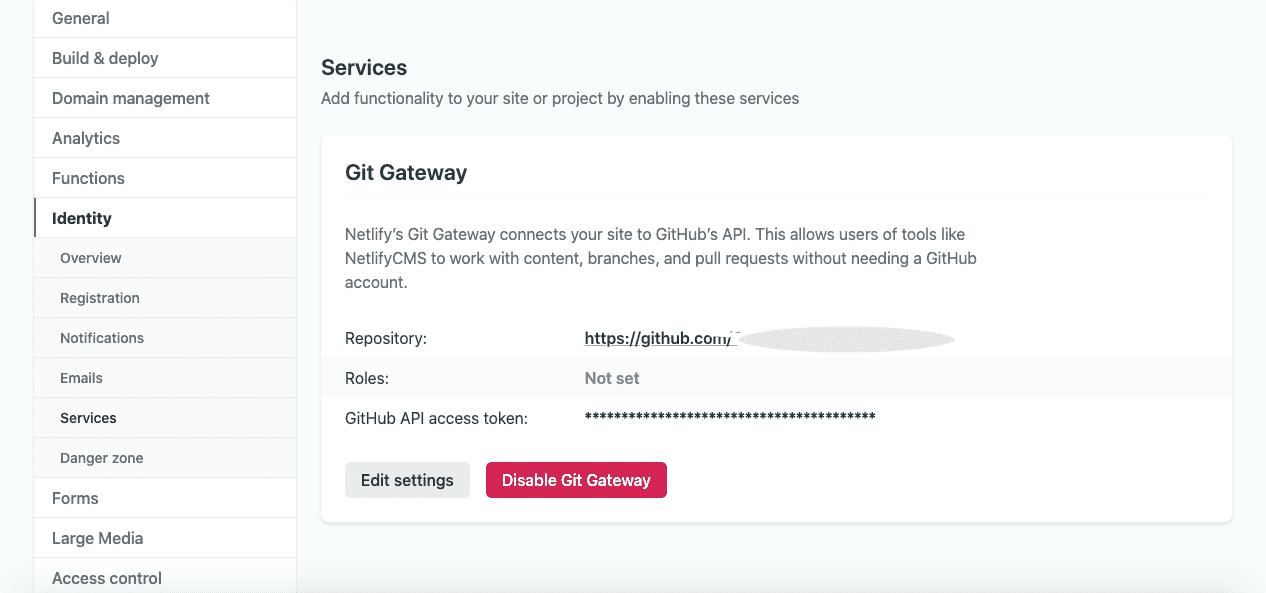
Go to the "Gateway" tab in the settings section. In the "Gateway" tab click on Enable gateway. This process is important to Enable access of the Admin login and registration page to stored content inside the git project.

Step 9: The user authentication
To set user authentication using Netlify cms using email verification. First, go to the Identity instance then registration preferences then click on Invite only and add user email id then send an email for access to the admin side.

Step 10: Ready to use
URL : <your_website name>/admin

Simran Advani
Sun Apr 27 2025

Divya Nautiyal
Wed Dec 27 2023

Jhansi Pothuru
Tue Dec 26 2023

Divya Nautiyal
Thu Dec 21 2023